|
|
How to use Auto Clicker?
Auto Clicker Asoftech can be used to automate mouse clicks on your computer.
Using Auto Clicker Asoftech is easy.
 Click on
'Add Robot' to add a robot, which may contain one or multiple mouse clicks. Click on
'Add Robot' to add a robot, which may contain one or multiple mouse clicks.

-
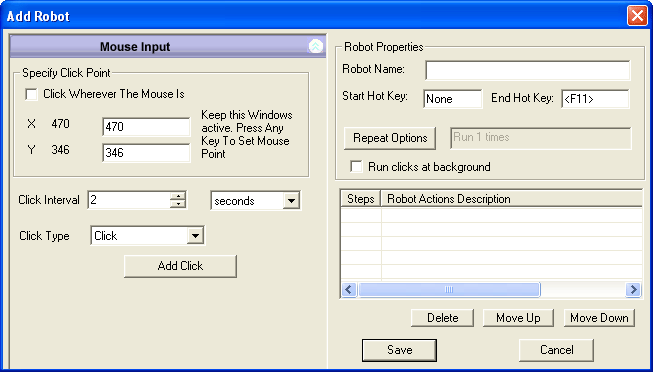
In Add Robot Window, specify point to click. MAKE SURE THE Add Robot Window REMAINS THE ACTIVE WINDOW,
Hover mouse over your intended target, and press any key. This will lock the coordinates of the mouse into the boxes.
Now that you have your click point set, modify the "Click Interval" spin buttons to tell the application how fast to click the mouse button.

After you have set click point and click interval interval, it's easy to choose click type. 
-
Now Simpley click
 to add the click to robot. to add the click to robot.
-
You can repeat step 1 to step 3 to add more clicks.
-
After clicks are added, you can specify robot name, start hotkey (keyboard shortcut to start the clicking), and how you want to repeat the robot.

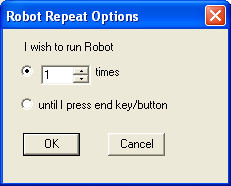
For robot repeat options, you can set to stop the robot after running x times, or you can let clicking to loop until you pressing end keyboard shortcut key.
-
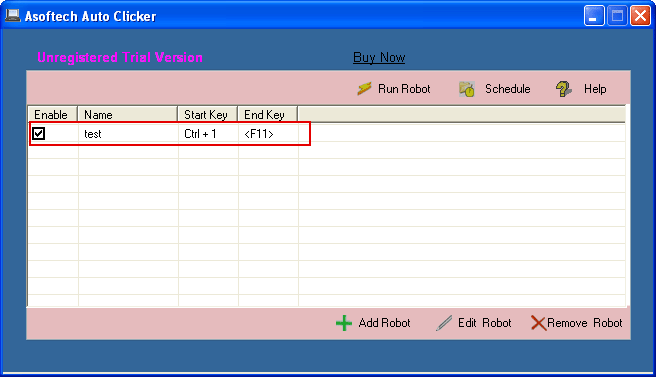
Now you can save the robot, you will see the robot shown in robot list.

You may notice the enable box is checked, which means that you can start the robot with start hotkey (Ctrl + 1 as in this example).
So when you hold down 'ctrl' key, and then press '1', the clicking will be started.
Press end hotkey (F11 as in the example) to stop it from running.
Adding more capabilities
- You may notice the "run clicks at background" checkbox in Add Robot Window.

It allows user to work on some document while the program is doing auto clicking. Read More
- User may want clicking to start automatically at 3am every day. Schedule feature enables user to schedule the robot to run at specific date/time.

For more information see Schedule Feature
Should you still have problems using the program,
please contact us.
|
|

